 Save
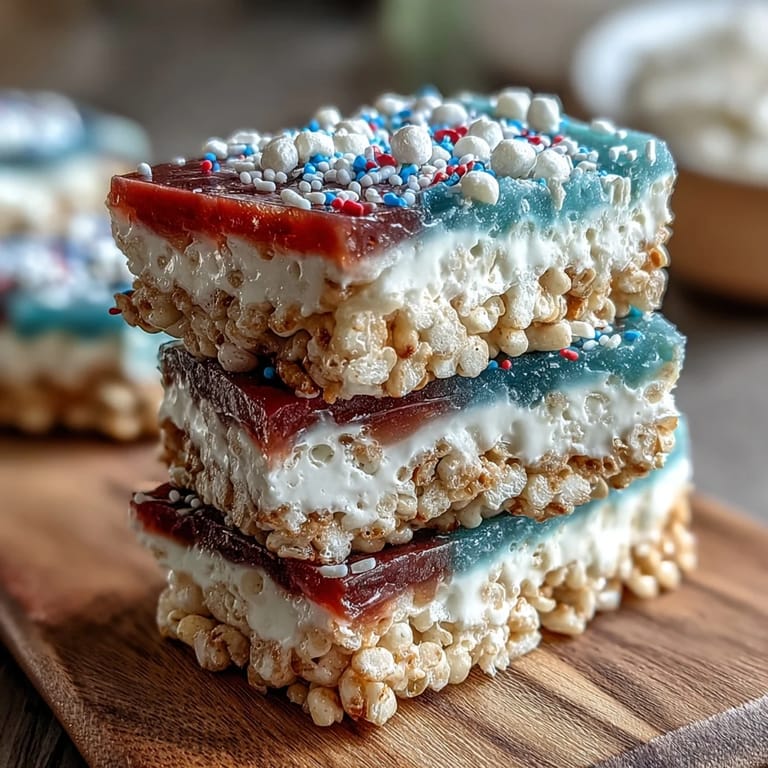
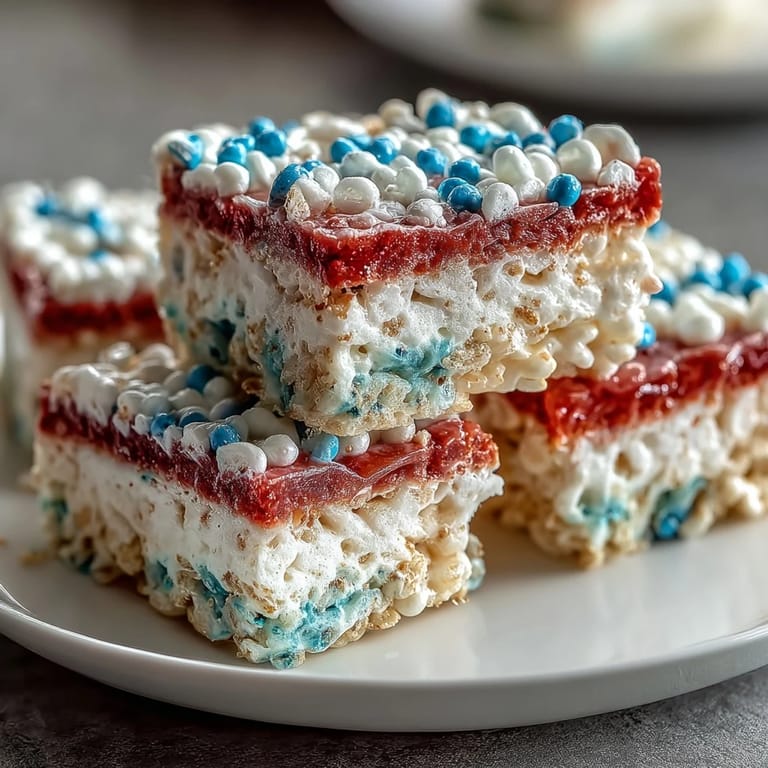
Save My neighbor showed up at my door one July afternoon with a pan of these striped treats, still warm from her kitchen, and I was honestly skeptical until I bit into that first square. The way the marshmallow melts on your tongue while the cereal stays crispy, and then that pop of color hits you—it felt like eating patriotism, which sounds ridiculous until you actually try it. Now whenever the Fourth rolls around, I find myself making batch after batch, pressing those sticky layers down with buttery hands and hoping the colors stay bold and true.
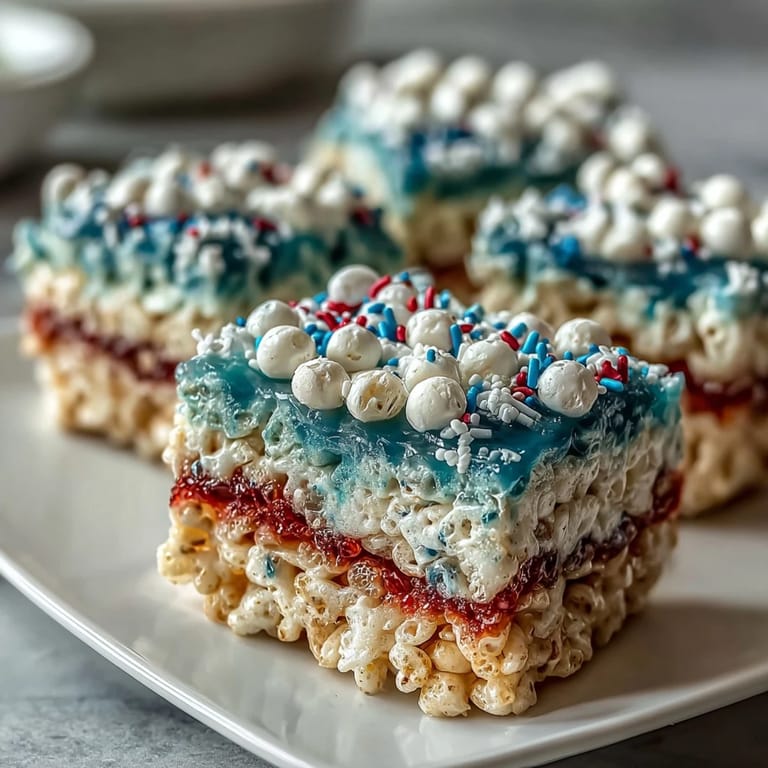
Last Fourth of July, I made these for a block party and watched my six-year-old niece's face light up when she realized each layer was a different color—she immediately bit through all three at once like she was solving a puzzle. An older neighbor I'd never really talked to came back for thirds and actually asked for the recipe, which led to a twenty-minute conversation about how sometimes the simplest things bring people together. That's when I realized this wasn't just about making a treat; it was about creating a moment.
Ingredients
- Rice Krispies cereal: Six cups total, divided evenly—this is your structure, so don't skimp or use stale cereal that's been sitting open for weeks.
- Mini marshmallows: One 10 oz bag, portioned into three equal parts, and yes, mini ones melt faster and distribute color more evenly than jumbo.
- Unsalted butter: Three tablespoons total (one per layer), divided precisely so each color layer has the right texture and doesn't turn out too greasy or too dry.
- Vanilla extract: Half a teaspoon stirred into the white layer to give it a subtle sweetness that makes it taste slightly different from the others.
- Red gel food coloring: A few drops per layer—gel stays concentrated and won't thin out your marshmallow mixture like liquid would.
- Blue gel food coloring: Same principle as red; a few drops is enough if you're using gel's concentrated pigment.
- Red, white, and blue sprinkles: Optional but honestly worth the small touch if you want that finished, festive look.
Tired of Takeout? 🥡
Get 10 meals you can make faster than delivery arrives. Seriously.
One email. No spam. Unsubscribe anytime.
Instructions
- Prep your pan:
- Line a 9x9-inch baking pan with parchment paper and give it a light grease—this step saves you from chasing crumbs later.
- Divide everything evenly:
- Split your marshmallows and butter into three equal portions so each layer gets a fair share and bakes up the same way.
- Make the red layer:
- Melt one tablespoon of butter in your saucepan over low heat, then add your first portion of marshmallows, stirring until they're completely smooth. Drop in your red food coloring a few drops at a time, stirring between each addition until the color deepens to what you're after.
- Add rice cereal to red:
- Stir in two cups of Rice Krispies until every piece glistens with the marshmallow mixture, then press the whole thing into the bottom of your pan using greased hands or a spatula.
- Build the white layer:
- Wipe your saucepan clean, melt the second portion of butter, add your second portion of marshmallows, and this time stir in the vanilla extract for a subtle flavor difference. Add your two cups of cereal and mix it all together, then gently press this layer on top of the red.
- Top with blue:
- Repeat the butter-melting process one last time, add your final marshmallows, color them blue, toss in the last of your cereal, and press that final layer into place. The key here is pressing gently so you don't squash everything down flat and lose that distinct layering.
- Optional sprinkle step:
- If you're using sprinkles, scatter them across the top while the treats are still slightly warm so they stick slightly and don't just slide off later.
- Cool completely:
- Let these sit undisturbed for at least an hour—I know it's tempting to dig in, but that cooling time is what gives you clean, neat squares instead of a gooey mess.
- Cut and serve:
- Lift the whole thing out using your parchment paper as handles, slice into sixteen squares with a sharp knife (wiping the blade between cuts helps), and watch them disappear.
 Save
Save There's something almost meditative about pressing each layer into place, watching the colors stack up like an edible flag taking shape under your hands. My daughter asked me one year why we don't make them any other time, and honestly, it's because they belong to this one specific weekend—they're the taste of summer freedom, sticky fingers, and neighborhood gatherings all rolled into one.
The Gel Coloring Difference
I learned this the hard way when I grabbed liquid food coloring from the back of my cabinet one year, thinking it would work the same as gel. The mixture became soupy, the cereal absorbed too much liquid, and the whole thing turned into a dense brick instead of those light, crispy-chewy treats everyone expects. From that moment on, I always keep gel coloring stocked, and I never look back—it's the difference between treats that shine and ones that disappoint.
Pressing and Layering Like a Pro
The secret I wish I'd known earlier is that slightly greased hands work better than a spatula for pressing layers—your warmth helps you feel exactly how much pressure to apply without crushing everything down. I usually dip my hands in a shallow bowl with a tiny bit of butter mixed with water, which gives you just enough slip to work with but doesn't add extra grease to the treats themselves.
Storage and Make-Ahead Magic
These treats actually stay fresh longer than you'd think if you store them right—the butter keeps them moist without making them greasy, and the marshmallow seals everything in naturally. One year I made them two days early and kept them in an airtight container, and they were just as good on party day as they were fresh from the pan.
- Keep them in an airtight container at room temperature for up to three days before they start to dry out.
- Stack them with parchment paper between layers so they don't stick together.
- Avoid the refrigerator, which dries them out faster than you'd expect.
 Save
Save These treats have become my thing—the dish people actually text me about weeks before the Fourth, asking if I'm making them this year. There's something special about feeding people something you made with your own hands that carries a memory of every time you've made it before.
Recipe FAQs
- → What type of food coloring works best?
Gel food coloring is recommended for vibrant colors without adding extra moisture, ensuring the right chewy texture.
- → How can I prevent sticking while layering?
Lightly grease your hands or use a spatula to press each layer evenly and prevent sticking.
- → Can I add extra flavor to the layers?
A pinch of salt or using salted butter can enhance the richness of the layers subtly.
- → What tools are needed to prepare these treats?
A large saucepan for melting, a 9x9-inch baking pan lined with parchment, and a spatula or spoon for mixing and pressing.
- → How long should the treats cool before slicing?
Allow at least 1 hour to cool and set so the layers hold together when sliced into squares.