Save
Save The first time my neighbor handed me a jar of her homemade kimchi, I was skeptical—I'd only ever bought the jarred stuff from the grocery store. But one spoonful of that vibrant, living ferment changed everything. The way it crackled on my tongue, how the flavors seemed to deepen with each bite, made me realize I'd been missing out on something essential. Now, making kimchi has become my favorite kitchen ritual, a two-day conversation between salt, heat, and time that never stops surprising me.
I'll never forget the day my partner came home to find me elbow-deep in cabbage, wearing gloves up to my forearms, laughing at how red the paste made everything. The kitchen smelled like garlic and ginger and possibility, and by the time we tucked those jars away to ferment, we both knew we'd made something worth waiting for. Three days later, we opened one jar at dinner and just sat there, quietly amazed that we'd created something so alive.
Ingredients
- 1 large napa cabbage (about 1.2 kg / 2.5 lbs): The foundation of everything—look for one that's firm and pale green, not yellowed or wilted, since you're counting on its crispness to survive the brine.
- 1 medium daikon radish (about 200 g), julienned: This adds a sharp, almost peppery note that balances the richness of the paste; don't skip it thinking a carrot will do the same work.
- 4 scallions, sliced: They soften slightly during fermentation but keep their gentle onion flavor, brightening every bite.
- 1 medium carrot, julienned (optional): Adds subtle sweetness and color; I include it most times because it makes the whole jar more visually inviting.
- 80 g (1/3 cup) coarse sea salt: The percentage matters here—this amount is precisely calibrated for your cabbage weight to create the right brine strength without over-salting.
- 1.5 liters (about 6 cups) cold water: Room temperature works fine, but cold water makes the cabbage stay crispier during brining.
- 6 cloves garlic, minced: Fresh garlic transforms during fermentation, becoming sweeter and more integrated; aged garlic won't give you that same alive quality.
- 1 thumb-sized piece fresh ginger, peeled and minced: The warming spice that makes you feel the fermentation happening—never use powdered ginger as a substitute.
- 1 small onion, roughly chopped: It dissolves into the paste during blending, creating body and depth you won't see but will absolutely taste.
- 3 tbsp fish sauce (or soy sauce for vegan): This is the umami anchor; fish sauce gives a deeper, more complex fermented note than soy sauce, but either works beautifully.
- 1 tbsp sugar: A small amount feeds the fermentation process and balances the heat—don't think of it as making kimchi sweet, but as waking up the other flavors.
- 3–5 tbsp Korean red chili flakes (gochugaru), to taste: This is where your kimchi gets its personality; start with three tablespoons and taste as you go, since different batches vary in heat intensity.
- 2 tbsp rice flour: When cooked into a paste, it acts as a thickener and feeds the good bacteria during fermentation, creating the right texture for everything to cling to.
- 150 ml (2/3 cup) water: For making the rice flour paste; slightly warm or room temperature water helps it cook evenly.
Tired of Takeout? 🥡
Get 10 meals you can make faster than delivery arrives. Seriously.
One email. No spam. Unsubscribe anytime.
Instructions
- Cut and prepare your cabbage:
- Slice the napa cabbage lengthwise into quarters, then chop across into 2-inch pieces so they're manageable to massage later but still substantial enough to hold texture. This is the meditative part—your knife should move rhythmically, and you'll start thinking about what's coming next.
- Brine your vegetables:
- Dissolve the sea salt in cold water in a large bowl, then submerge the cabbage pieces, making sure they're all underwater; use a plate weighted down with something heavy so nothing floats. Toss every 30 minutes over the next 2 hours—this is when the cabbage begins to surrender its water and soften, weeping brine that will eventually become part of your ferment.
- Rinse thoroughly:
- Drain the brined cabbage in a colander and rinse it under cold running water 2–3 times, gently pressing to remove excess salt but not so hard that you bruise the leaves. This step takes patience, but under-rinsing creates kimchi that's too salty, and you'll regret it immediately.
- Cook and cool your rice paste:
- In a small saucepan, whisk the rice flour with 150 ml water over medium heat, stirring constantly until it thickens into a smooth, slightly glossy paste about 1–2 minutes. Transfer it to a bowl and let it cool completely—warm paste will make your blender sweat, and cooling gives it the right texture to blend smoothly.
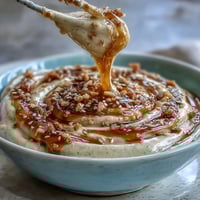
- Make the spice paste:
- Combine the cooled rice paste, minced garlic, minced ginger, chopped onion, fish sauce, and sugar in a blender and blend until completely smooth and silky, about a minute. Stir in the gochugaru by hand, tasting as you go, because once it's blended in, you can't take it back.
- Combine and massage:
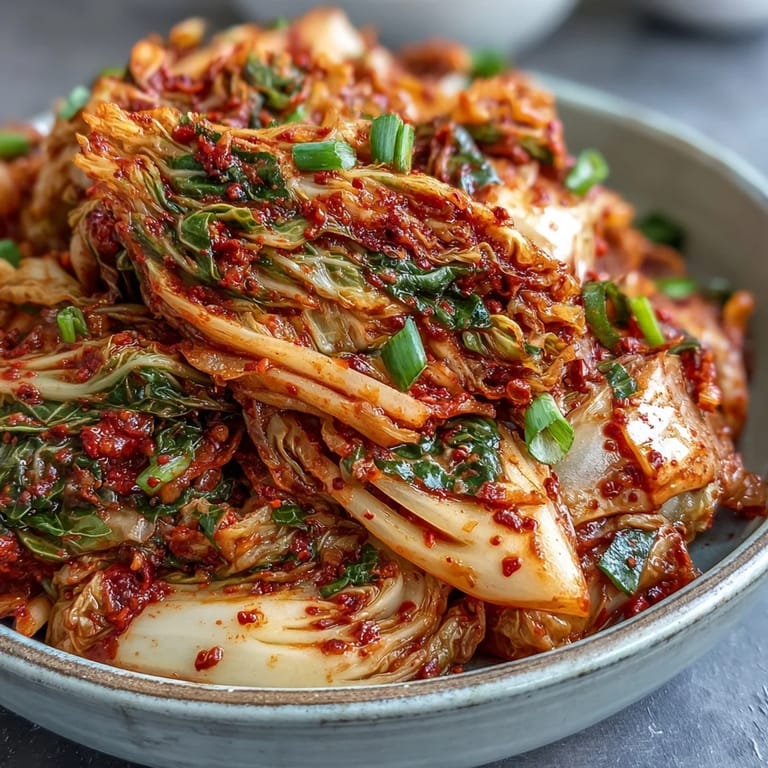
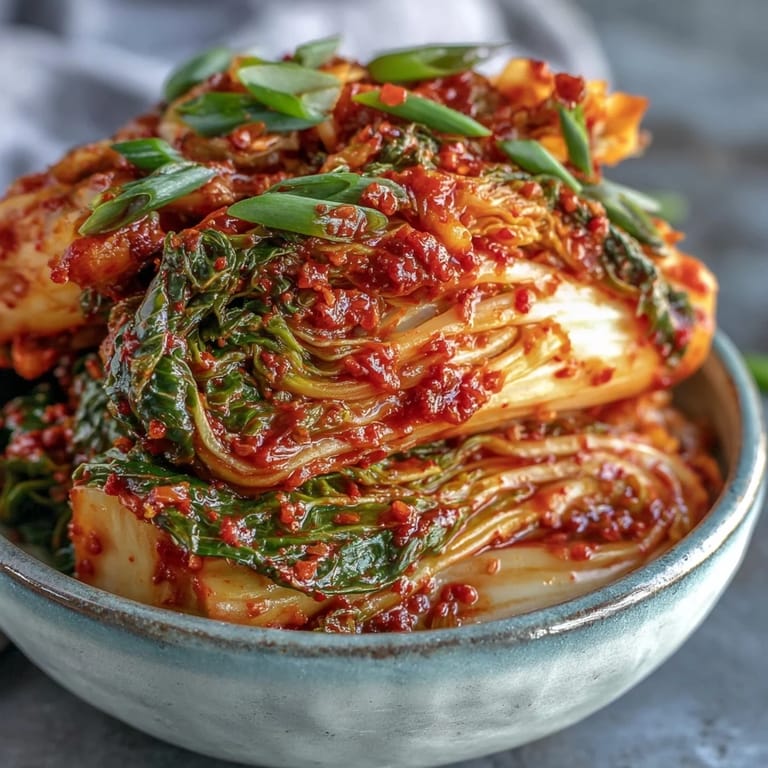
- In a large bowl, toss together the drained cabbage, julienned daikon, carrot if using, and sliced scallions, then add the spice paste. Put on your kitchen gloves and massage everything together with your hands for a few minutes, really working the paste into every leaf until everything glistens and nothing is dry—this is where the magic starts happening.
- Pack your jars:
- Transfer the kimchi into clean glass jars or a fermentation crock, pressing down firmly with your knuckles or a spoon to eliminate air pockets and submerge the vegetables under their own brine. Leave at least an inch of headspace at the top because the fermentation will create pressure and bubbles you need somewhere to go.
- First fermentation:
- Seal your jars and leave them at room temperature away from direct sunlight for 1–2 days, opening the lids once daily to release the built-up gas—you'll hear a satisfying hiss that means things are working. After 48 hours, taste a piece; if it's already developing that tangy, slightly sour flavor you love, it's ready to move to the fridge.
- Refrigerate and mature:
- Once it reaches the sourness you want, transfer the jars to the refrigerator where fermentation slows dramatically but continues to deepen the flavors week after week. Kimchi keeps for months in the cold, and honestly, it gets better and more interesting as time passes.
 Save
Save Last winter, my mother-in-law visited from Korea and tasted my homemade kimchi without knowing I'd made it. When I told her, her face did this thing where surprise and pride mixed together, and she said it tasted like I understood something important about patience and fermentation. That moment made me realize kimchi is more than a side dish—it's a small act of faith that good things take time.
The Science of Fermentation Happening in Your Jar
What's magical about kimchi is that you're not cooking it in the traditional sense—you're creating an environment where beneficial bacteria thrive and transform the raw vegetables into something more complex and alive. The salt initially keeps harmful bacteria at bay while lactobacillus and other wild fermenters colonize the jar, producing lactic acid that gives kimchi its signature tang and extends its shelf life indefinitely. The rice flour paste acts as a food source for these microbes, and as they work, they create compounds that are genuinely good for your gut and impossible to replicate in a jar that's been pasteurized.
Finding Your Perfect Heat Level
Gochugaru is where your kimchi gets its personality, and there's no single right answer about how much to use. I started with three tablespoons and found it created a gentle warmth that made me reach for more without setting my mouth on fire; my partner prefers four and a half because he likes the heat to linger. The best approach is to start conservative, blend everything, and taste a tiny piece—if you want more fire, you can always add another tablespoon and stir it through, but you can't undo it once it's mixed in.
Serving and Storing Your Creation
Kimchi lives best in the refrigerator, where it will keep for months and actually improve over time as the flavors meld and deepen. Serve it as a crunchy side dish with rice and eggs for breakfast, stir it into soups during the last minute of cooking, use it as a sandwich filling, or simply eat it straight from the jar when you want something alive and flavorful on your tongue. The liquid that accumulates at the bottom of your jar is liquid gold—it's called kimchi juice, and you can drink it straight, use it as a marinade, or stir it into soups for instant depth.
- If your kimchi ever gets too sour and intense, use it in kimchi jjigae (a bubbling stew) where the sourness becomes an asset rather than overwhelming.
- Save a few tablespoons of kimchi liquid when you finish a jar and use it as a starter culture for your next batch, which cuts fermentation time significantly.
- Unopened jars in the fridge will ferment slowly for months, so don't feel pressured to eat it all at once—it's actually improving as it sits.
 Save
Save Making kimchi taught me that some of the best things in life require patience, salt, and trust that invisible forces are working in your favor. Once you've made it once, you'll understand fermentation in a way that opens doors to making other things—sourdough, kombucha, miso—with confidence.
Recipe FAQs
- → How long does kimchi fermentation take?
Kimchi typically ferments at room temperature for 1-2 days before developing sufficient tanginess. After refrigeration, the fermentation continues slowly, allowing flavors to deepen over several weeks. Taste daily to find your preferred sourness level.
- → Can I make kimchi without fish sauce?
Absolutely. Substitute fish sauce with soy sauce or specialized vegan fish sauce alternatives for a plant-based version. The umami richness remains, though the flavor profile shifts slightly toward earthier notes.
- → Why do I need to burp the kimchi jars?
Burping releases carbon dioxide produced during active fermentation. Without venting, pressure builds inside sealed containers, potentially causing leaks or breakage. Open jars briefly once daily to release accumulated gas safely.
- → What makes kimchi bubble during fermentation?
Bubbling indicates healthy lactic acid bacteria activity. These beneficial microorganisms consume vegetable sugars, producing carbon dioxide and lactic acid naturally. The effervescence confirms successful fermentation and developing probiotic content.
- → How should I store finished kimchi?
Refrigerate kimchi after achieving desired tanginess. Cold temperatures dramatically slow fermentation while preserving texture and flavor. Keep submerged in its brine, using clean utensils to prevent contamination. Properly stored kimchi lasts months.
- → What can I serve with kimchi?
Kimchi shines alongside steamed rice, fried eggs, or in savory pancakes. Add to soups, stews, or ramen for depth. Incorporate into grilled cheese sandwiches, tacos, or burgers for a spicy kick. The possibilities are endless.